
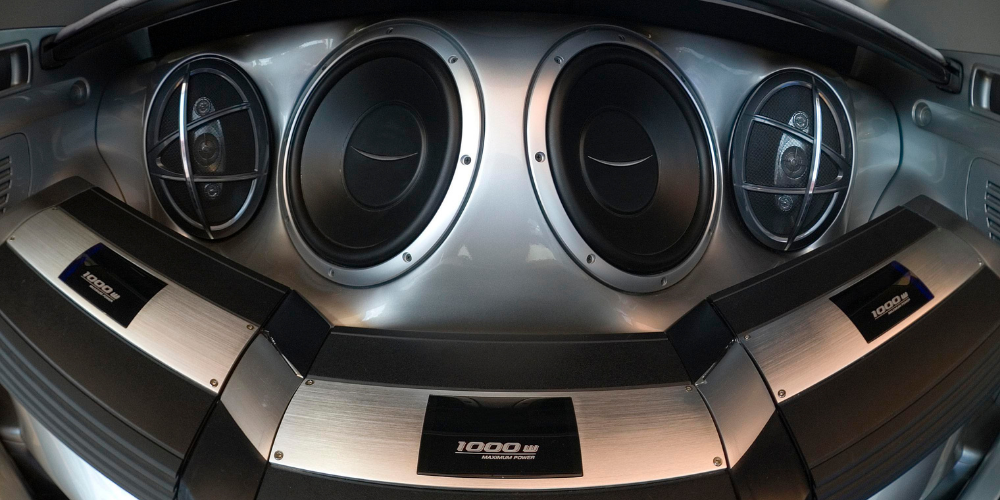
Whether it is a weekend getaway to the countryside or a 3am drive that aimlessly accelerates through the mild winds and extreme quiet, there’s music to resonate with every mood and scenery. Who doesn’t revel in a long aimless drive and that too with the music on loud volume?
The term ‘loud volume’ comes with tons of standards to maintain the pace and quality of sound. Nobody would admire the distortion bursting through the speakers, thumping the car and hitting the chest. Thus, a descent amplifier that is compatible with the speakers is a check to ensure.
So, how to test a car amplifier with a multimeter? What kind of a tool do you really need to do when you want to test your car amplifier? If your questions are somewhat like these, then this article is an answer you’re searching for.
To test your car amplifier, you need a multimeter and this article, you will come across a step-by-step guide to use a multimeter in checking if your car amplifier is worth keeping. While the process isn’t too much of a deal of endeavours, you must understand what a multimeter is in order to use it for the test.
What is a multimeter?
If you are someone who is not already into using the workings of electronic devices to resolve technical glitches, then you must know that the multimeter is used to treat the electronics. Here’s the meaning and purpose of the multimeter for you to understand before you use it to test your car amplifier.
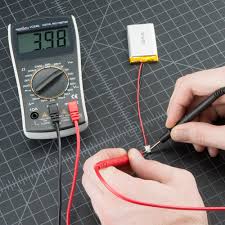
The multimeter is what you require to test the operating levels correctly. You can measure the current, the resistance along with the voltage in any electronic circuit with the help of a multimeter. It comes in two versions, the digital multimeter as well as the analog multimeter.
The digital multimeter turns out to be an ideal tool in the terms of user-friendliness as well as the precise calculations. It comes in two types of leads, with one being red and another, black.
The Red lead has to be connected to the resistance, voltage or the current and is meant as a positive (+) terminal. On the other hand, there is a black lead. It is to be connected to the common/ground port and is taken for a negative (-) terminal. Apart from that, you have probes on the multimeter in order to hold the connections that are tested.
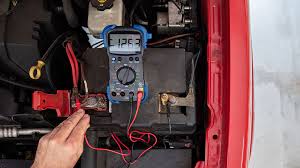
You must be willing to make sure that it is a multimeter that you definitely use in order to test your car amp. Well, yes and you can do it easily. You need to keep the amplifier on VDC mode and have the wires properly set. Also, don’t forget to check the fuse in your amp with the output and give a look at the voltage as well.
A Step-by-step guide to check your car amplifier with a multimeter
While you are wondering how can testing your car amplifier with a multimeter not be an annoying task, we have brought you the step-by-step guide that can simply be used to effectively test your car amp. Let us get started with preparation of the multimeter to use it for the test.
First of all, you will require a multimeter with a reliable quality. To buy a good quality multimeter, you can either seek any electronic store or you can shop online. All you need to ensure is that there is no compromise being made on its quality. Once you have the multimeter, you first need to configure it.
Rate the meter based on the usual number of amperes that pass through the circuit. You will find the approximate amperes along with the maximum handled amperes mentioned on the nameplate on the circuits. Do not cross the amperes mentioned on there.
Configuration and Setup of Multimeter
In order to start the process, you first need to ensure that your multimeter is configured properly. To configure the multimeter, you have to follow these steps:
- There are two sections in the multimeter, the Voltage Direct Current (VDC) and the Voltage Alternating Current (VAC). As you are going to test your car amplifier, you must have your amp set at VDC mode that uses direct current to run.
- Now, you have to set the wires. Get the balck wire plugged into the common circuit and plug the red wire in the socket which is labeled A.
- In the next step of this setup, you have to set the amperage. To do that you have to rotate the dial present at center in your multimeter. You must set the given amperage, according to the socket.
Following the guide above, your multimeter will now be ready with configuration.
Testing the Amplifier
Now that you have configured the multimeter and corrected the settings successfully, you can finally move to testing your car amplifier.
- Find the amplifier in your car
First things first, spot your amplifier in your car. If it is a factory-installed amplifier that you are willing to test, its location depends on the brand of your car as well the model. Thus, you are required to find where your amplifiers are fitted in the car. You can check the backseat or dashboard and for the best, you can check the car manual.
- Check the fuse
Once you have spotted the amplifier, the next thing you have to do is to test the fuse of your amplifier. You can check the voltage given with the amplifier.
3. Check the protection mode
Your car amplifier has a protection mode. In order to keep itself from any damage, your car amplifier heads into protection mode which may seem irritating to you. The reason because of which it protects itself is an incorrect installation and wiring setup. Sometimes, it gets protected because of some internal failure.
Now, what you have to do is to disconnect the connections and turn on the amp in order to check it. If you find the protection mode on, know that there is a glitch ahead. So, get your amp connected with the multimeter and also, check the voltage of the wires that are connected to the amp in order to test the wiring issues.
4. Look into the output
In the next step, you have to get the multimeter wire plugged into the output channel so that you can test the output frequency. You will find the multimeter with the reading. In case there’s no reading visible on the multimeter, know that the output has failed.
5. Check the signals
Now, get the signals from your amp checked. If you experience the fluctuation in the signals then know that there is going to be distortion.
6. See the Voltage
Connect your amp with a multimeter and check the voltage from the amp. If your amp is showing a voltage in less than 10volts, you should get it checked by a technician.
So, here these are the areas where you can perform the test on your car amplifier using a multimeter. From output to the signals, you can test your car amplifier status with a multimeter easily. But then, there are some measures to be taken in order to do the test only the easy way but also at the safest side.
Precautions

Now that you have walked through the steps to test an amplifier with a multimeter, there are some precautions that you must keep in mind before getting started with the process and follow them in order to prevent any incorrect readings and results as well as keep things safe and sane.
- You must always have the dial and test leads positioned correctly in order to fetch the measurements in the most precise way.
- Turn the power off before getting the meter connected.
- Never use the digital multimeter wires that are damaged.
- Always use the finger guards that are present on the test probes to keep your fingers on. This safety measure is important to prevent any situation while testing an amplifier.
- Never use the resistance while checking the power of an amp or it will wreak havoc on your multimeter.
Final Thoughts
Now that you have tested your car amplifier using the multimeter, it is possible that you may end up extracting more issues in it. If you have a side of technicality in yourself then you can effortlessly move ahead to remove and reconnect the wires, set and test the connections while loaded with cables, fans and a multimeter. But it is still best to get your amp looked into by a professional if you seem to carry a little less of a knowledge on its repairing.
Let’s wind up the section hoping that this guide has led your way to test a car amp with a multimeter with ease, with a gentle reminder of keeping it safe. If it’s still tricky and you do not seem to get a hold of it, then you know, there’s always a car audio shop to head out to.